The Ultimate Guide to Making Crispy Baked Kale Chips


Are you looking for a healthy and delicious snack that you can enjoy guilt-free? Look no further than crispy baked kale chips! Made with just a few simple ingredients, these homemade chips are easy to make, packed with nutrients, and incredibly addictive. In this ultimate guide, we will walk you through the step-by-step process of making perfectly crispy kale chips, share some useful tips and tricks, and even explore different flavor variations. Get ready to satisfy your cravings with this nutritious and flavorful snack.
Table of Contents
- Introduction
- Benefits of Kale Chips
- Ingredients You’ll Need
- Step-by-Step Instructions
- Tips for Success
- Choosing the Right Kale
- Storing Baked Kale Chips
- Flavor Variations
- Community Tips and Praise
- Nutrition Facts
- Frequently Asked Questions (FAQs)
- Conclusion
1. Introduction
In recent years, kale has gained immense popularity as one of the healthiest leafy greens available. Packed with vitamins, minerals, and antioxidants, kale is a nutritional powerhouse that offers numerous health benefits. While kale is often enjoyed in salads and smoothies, it can also be transformed into a crispy and satisfying snack – kale chips.
Kale chips are a fantastic alternative to traditional potato chips. They provide a satisfying crunch and a burst of flavor, making them an excellent option for those seeking a healthier snack. The best part? You can easily make them at home with just a few simple ingredients. Let’s dive deeper into the benefits of kale chips and discover how to make them yourself.
2. Benefits of Kale Chips
Kale chips offer a wide array of health benefits, making them a smart choice for snacking. Here are some of the key advantages of incorporating kale chips into your diet:
a. Nutrient-Rich:
Kale is known for its exceptional nutritional profile. It is rich in vitamins A, C, and K, along with minerals like calcium, potassium, and iron. By consuming kale chips, you can boost your intake of these essential nutrients, supporting overall health and wellbeing.
b. Antioxidant Powerhouse:
Kale is packed with powerful antioxidants that help combat oxidative stress and reduce the risk of chronic diseases. These antioxidants, such as beta-carotene and vitamin C, can support a healthy immune system and protect against cellular damage.
c. Low in Calories:
Compared to traditional potato chips, kale chips are significantly lower in calories. This makes them a great option for individuals looking to manage their weight or follow a calorie-controlled diet.
d. High in Fiber:
Kale is an excellent source of dietary fiber, which aids digestion, promotes satiety, and helps maintain stable blood sugar levels. By enjoying kale chips, you can increase your fiber intake and support a healthy digestive system.
3. Ingredients You’ll Need
To make a batch of delicious baked kale chips, you’ll only need a handful of simple ingredients. Here’s what you’ll need:
a. 1 bunch of kale:
Choose fresh kale with vibrant green leaves. You can use either curly kale or flat lacinato kale, depending on your preference.
b. 1 tablespoon of olive oil:
Use extra-virgin olive oil for its rich flavor and health benefits. It will help the kale chips crisp up nicely.
c. 1 teaspoon of flaked sea salt:
Flaked sea salt adds a savory touch to the kale chips. Feel free to adjust the amount according to your taste preferences.
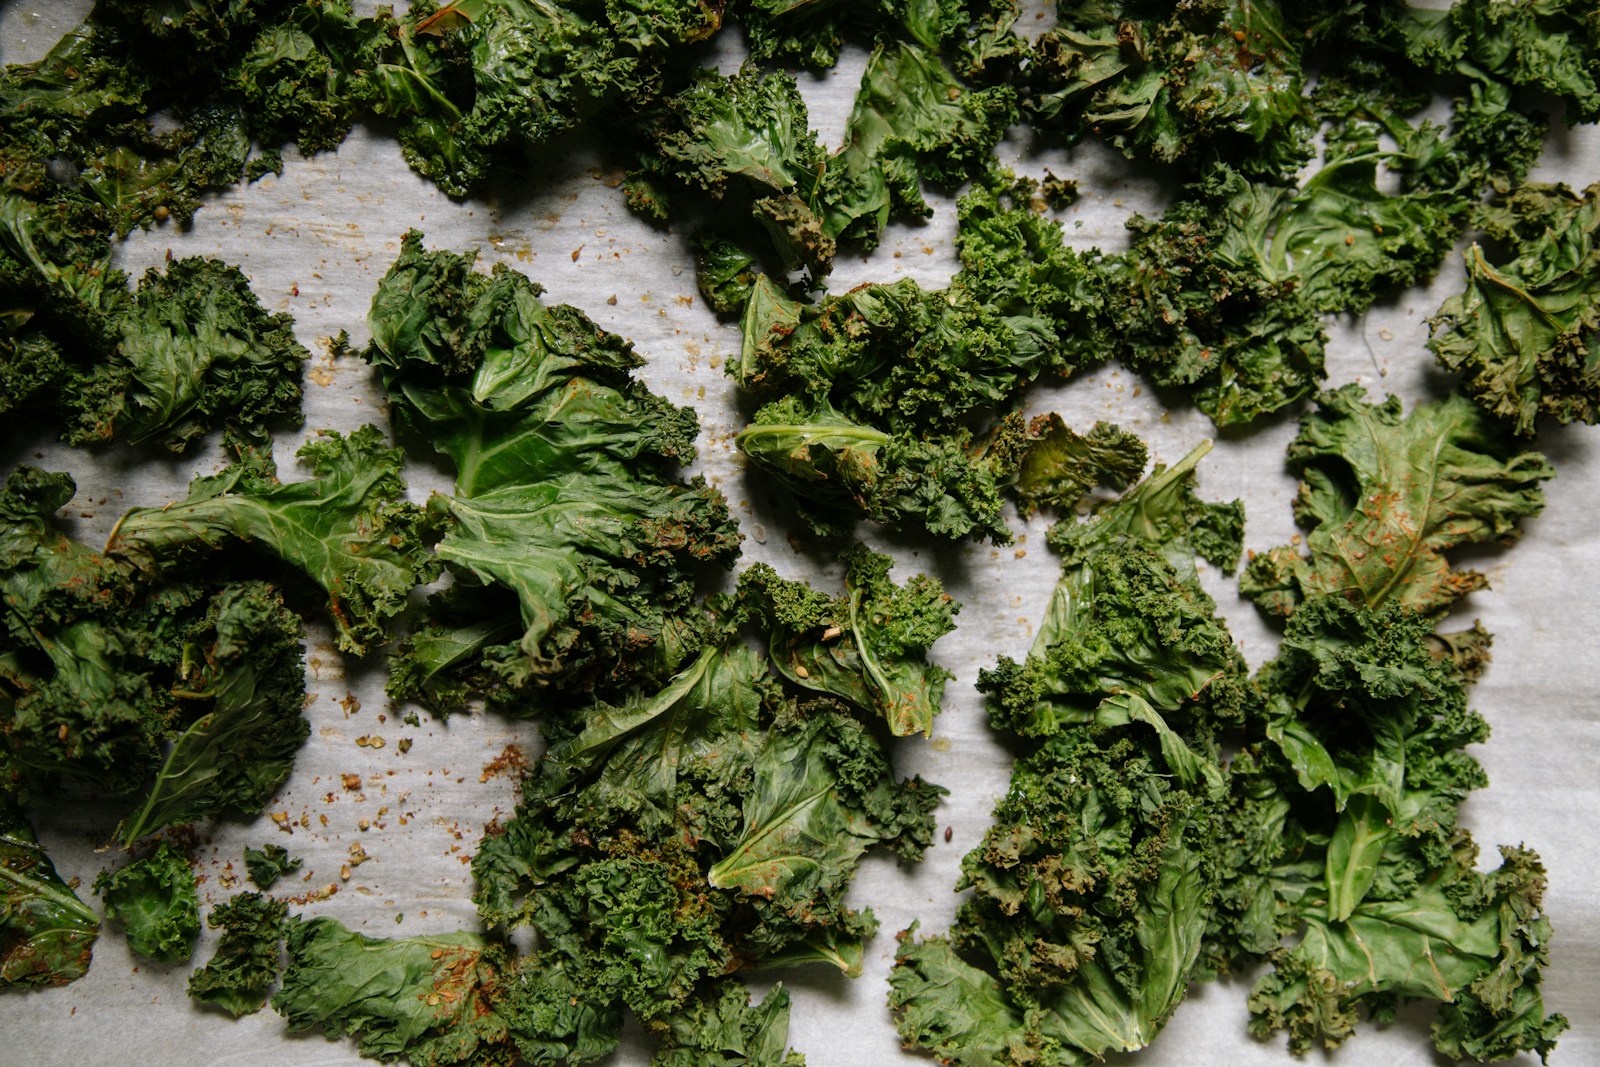
4. Step-by-Step Instructions
Now that you have gathered your ingredients, it’s time to start making your crispy baked kale chips. Follow these simple steps for a foolproof cooking process:
Step 1: Preheat the oven:
Start by preheating your oven to 300°F (150°C). Line a rimmed baking sheet with parchment paper to prevent the kale from sticking and ensure easy cleanup.
Step 2: Prepare the kale:
Using a knife or kitchen shears, carefully remove the kale leaves from the thick stems. Tear the leaves into bite-sized pieces, discarding any tough stems or ribs.
Step 3: Wash and dry the kale:
Thoroughly wash the kale leaves under cold water to remove any dirt or debris. Use a salad spinner or pat them dry with a clean kitchen towel to remove excess moisture. It’s crucial to dry the leaves thoroughly to achieve crispy kale chips.
Step 4: Toss with olive oil:
Place the dried kale leaves in a bowl and drizzle them with olive oil. Use your hands to toss the leaves, ensuring they are evenly coated with oil. Be sure not to overdo it with the oil, as too much can prevent the chips from crisping up.
Step 5: Arrange on the baking sheet:
Spread out the kale leaves in a single layer on the prepared baking sheet. It’s essential to give each leaf enough space to crisp up evenly. If needed, bake the chips in batches to avoid overcrowding.
Step 6: Sprinkle with sea salt:
Sprinkle the kale leaves with flaked sea salt, evenly distributing it over the chips. The salt will enhance the flavor and add a touch of seasoning to the chips.
Step 7: Bake until crispy:
Place the baking sheet in the preheated oven and bake the kale chips for 20 to 30 minutes. Keep a close eye on them to prevent burning. The chips are ready when they turn crispy and the edges start to brown. Remember, the chips will continue to crisp up as they cool.
Step 8: Enjoy!
Once the chips are ready, remove them from the oven and let them cool on the baking sheet for a few minutes. Transfer them to a serving bowl or plate and enjoy your homemade crispy baked kale chips!
5. Tips for Success
While making baked kale chips is a straightforward process, a few tips can help you achieve the best results. Here are some key tips to keep in mind:
a. Dry leaves completely:
To ensure crispy kale chips, it’s crucial to dry the leaves thoroughly after washing. Use a salad spinner or pat them dry with a kitchen towel to remove any moisture. Damp leaves can result in soggy chips.
b. Use a light hand with oil:
When coating the kale leaves with olive oil, remember to use a light hand. Too much oil can prevent the chips from crisping up properly. A thin, even coating is all you need.
c. Spread out the leaves:
Use a large rimmed baking sheet to allow each kale leaf to lie flat in a single layer. Bunched up or folded leaves won’t crisp up evenly. If necessary, bake the chips in batches to ensure proper spacing.
d. Avoid overbaking:
Baked kale chips can turn bitter if overcooked. It can be challenging to judge their doneness by color alone, as they don’t brown like traditional chips. Remove the chips from the oven before they turn brown, while still slightly soft in the center. They will continue to crisp up as they cool.
By following these tips, you can ensure perfectly crispy and flavorful kale chips every time.
6. Choosing the Right Kale
Both curly kale and lacinato kale, also known as dinosaur kale, work well for making kale chips. While curly kale has a frilly appearance, lacinato kale has a more leathery texture. Some people prefer one over the other, so feel free to experiment with both and see which variety you enjoy most.
When selecting kale, look for fresh leaves with vibrant green color. Avoid kale with yellow or wilted leaves, as they may not yield the best results. Organic kale is always a good choice if available, as it tends to have a more robust flavor and fewer pesticide residues.
7. Storing Baked Kale Chips
If you don’t devour all the kale chips right away, you’ll want to store them properly to maintain their crispiness. Here’s how to store your homemade baked kale chips:
a. Let them cool completely:
Allow the baked kale chips to cool completely before storing them. This ensures that any residual moisture evaporates, preventing them from becoming soggy.
b. Opt for an airtight container:
For kale chips seasoned with dry ingredients like salt or spices, store them in an airtight container at room temperature. They can remain fresh for up to a week, although it’s best to consume them within two or three days. If you’ve added perishable ingredients like cheese, store the chips in an airtight container in the refrigerator.
By storing your baked kale chips properly, you can enjoy their crispy texture and delicious flavor for several days.
8. Flavor Variations
Once you’ve mastered the basic recipe for baked kale chips, you can get creative with different flavor variations. Here are a few ideas to inspire your culinary experiments:
a. Spicy Sriracha-Lime Kale Chips:
For a kick of heat and tangy flavor, drizzle the kale leaves with sriracha sauce and lime juice before baking. The result is a batch of deliciously spicy and zesty kale chips.
b. Tangy Salt and Vinegar Kale Chips:
If you’re a fan of the classic salt and vinegar chips, you’ll love this flavor variation. Sprinkle the kale leaves with vinegar and a pinch of salt to achieve that tangy and savory taste.
c. Sweet Maple Kale Crisps:
Looking for a touch of sweetness? Drizzle the kale leaves with maple syrup before baking. The combination of sweet and savory flavors creates a delightful snack that satisfies all cravings.
Feel free to experiment with different spices, herbs, or even grated cheese to create your own unique flavor combinations. Let your taste buds guide you!
9. Community Tips and Praise
The Allrecipes community has embraced the trend of making homemade baked kale chips, and many home cooks have shared their tips and experiences. Here are a few commendations and recommendations from fellow kale chip enthusiasts:
“Followed the advice of another reviewer and turned the oven down to 300 degrees F and cooked for 20 minutes, then turned the oven off and let it sit for another 10 min. Also, put torn kale in a bowl and tossed quite a bit to coat evenly with oil, spread in an even layer on a cookie sheet and sprinkled with seasoned salt (much less than 1 teaspoon) from up high. These were so good!” – valleyval
“So excited to have kids excited about kale, from growing it in our garden and tending to it right up to harvesting, cleaning, drying, baking, and snacking. In our oven, 300 degrees F for about 12 minutes works great.” – ILovePotatoes
“These babies inspired me to sign up and begin a recipe box. They were that good! I tried different seasonings: mustard seed (okay), Chinese 5-spice seasoning (good), garlic salt (great), cumin with a pinch of salt (excellent!), BRAGGS seasoning (superb!). I’m in the same boat as all of these reviewers — completely surprised by how enjoyable they are.” – halimah
These helpful tips and positive reviews from the Allrecipes community can guide you in your kale chip-making journey and inspire you to get creative with flavors.
10. Nutrition Facts
It’s essential to know the nutritional value of the food we consume. Here’s an overview of the approximate nutrition facts per serving of baked kale chips:
| Nutrient | Amount Per Serving |
|---|---|
| Calories | 58 |
| Total Fat | 3g |
| Saturated Fat | 0g |
| Sodium | 185mg |
| Total Carbohydrate | 8g |
| Dietary Fiber | 2g |
| Protein | 3g |
| Vitamin C | 90mg |
| Calcium | 104mg |
| Iron | 1mg |
| Potassium | 337mg |
Please note that the nutrient information may vary depending on the specific ingredients used and the portion size. These values are approximate and based on a 2,000 calorie diet.
11. Frequently Asked Questions (FAQs)
Q1: Can I use other types of oil instead of olive oil?
A1: Yes, you can use other oils like avocado oil or coconut oil. However, keep in mind that they may impart a different flavor to the kale chips.
Q2: Can I use other seasonings besides sea salt?
A2: Absolutely! Feel free to experiment with various seasonings such as garlic powder, paprika, cayenne pepper, or even nutritional yeast for a cheesy flavor.
Q3: Can I make kale chips in an air fryer?
A3: Yes, you can make kale chips in an air fryer. Simply follow the same steps and adjust the cooking time and temperature according to your air fryer’s instructions.
Q4: Can I freeze baked kale chips?
A4: It’s generally not recommended to freeze kale chips, as they may lose their crispiness and become soggy upon thawing.


Post Comment